
I spend most of my working life on legislative software, but I trained as an electrical engineer, and every so often I want a piece of hardware on the bench again. This time it’s the uConsole from ClockworkPi: a small handheld Linux computer with a 5-inch screen, a built-in keyboard and trackball, and a socket for a Raspberry Pi compute module. It’s meant to be opened up and modified, which makes it a natural starting point for a cyberdeck.
I’ve always been fascinated by small electronic gadgets. I could probably open a museum with all the devices I’ve collected over the years. My first programming experience was writing a Defender-style video game in Z80 machine code on a Timex Sinclair 1000. I think that little project meant more to my career than the degree I was working towards at the time. The uConsole felt like a return to that kind of tinkering.
I ordered mine back in February, and then came a long, silent wait. A few days ago the kit finally showed up, which was quite a surprise.
These are my notes from the first weekend: what worked straight away, what didn’t, and what fixed it. If you’ve just unboxed one yourself, some of this may save you an afternoon.
The setup
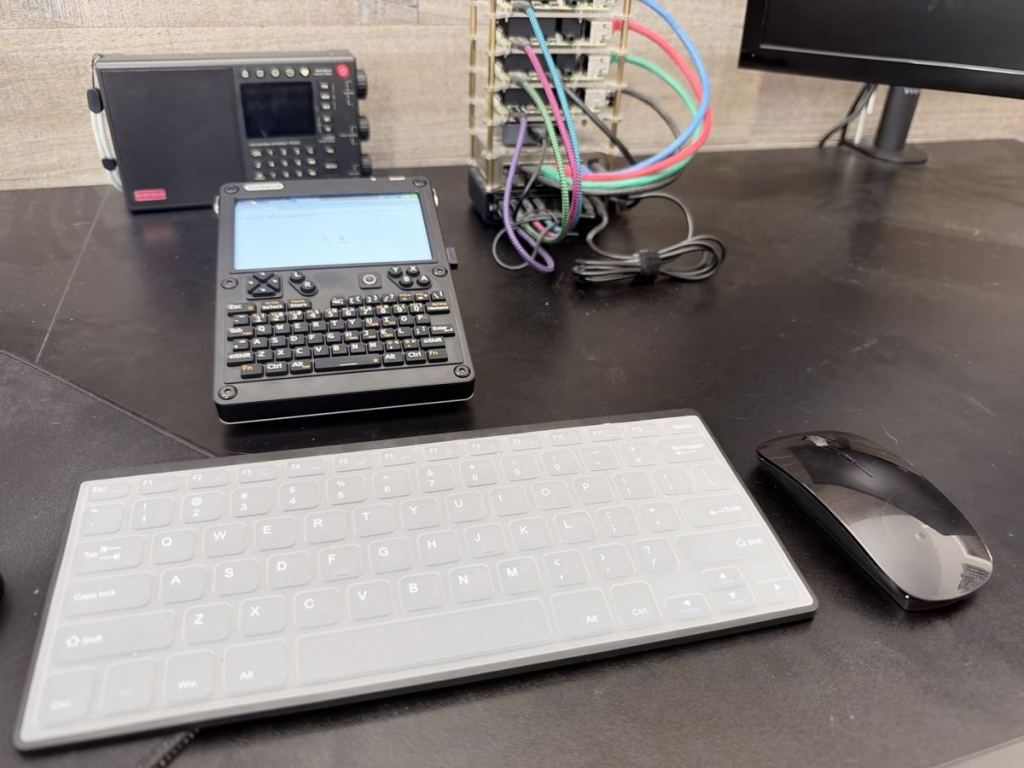
The uConsole comes as a kit that you assemble yourself. Mine has a Raspberry Pi CM4 compute module on ClockworkPi’s adapter board, and I’m running the latest Raspberry Pi OS image that ClockworkPi provides, which includes the patches the uConsole needs for its screen, keyboard and audio.
First, find some batteries
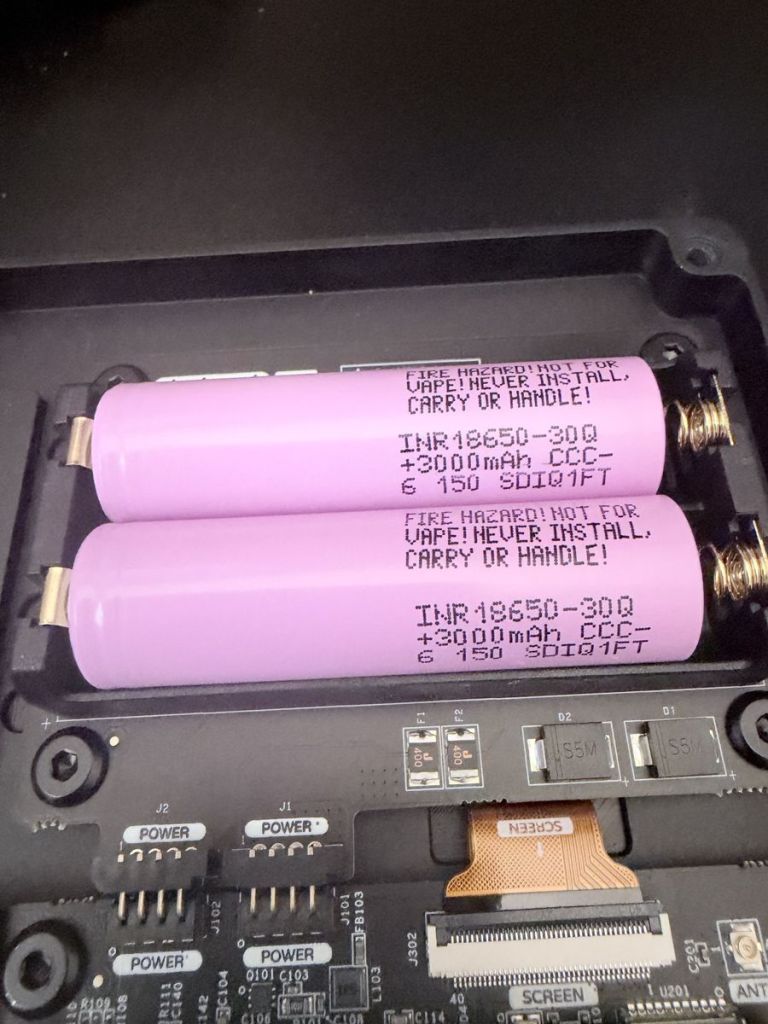
The first problem came before I’d even turned it on: the uConsole doesn’t ship with batteries. It runs on two 18650 lithium-ion cells, and you have to source your own. After reading plenty of warnings about the no-name cells sold on Amazon, I decided not to take chances with something that sits in my hands, and bought a pair of genuine Samsung 30Q cells (3,000 mAh each) from the 18650 Battery Store. They shipped from Atlanta, so it was four days before they reached me in San Diego. If you can, plan ahead for the batteries. With my eight-month wait, ordering them along with the uConsole wouldn’t have made sense, but it’s worth having them on hand before the kit arrives.
The build: half an hour and a few glitches
The build itself was quite easy, though there were a few glitches along the way. The “Mount the Core (E)” step in the instructions doesn’t explain that the Raspberry Pi Compute Module 4, the small system-on-module (SoM) that does the actual computing, has to be snapped onto its carrier board before the two go onto the main board. What’s more, the CM4 in the diagram doesn’t have its chips laid out the same way as the real one, so I had to be extra careful to get the orientation right.
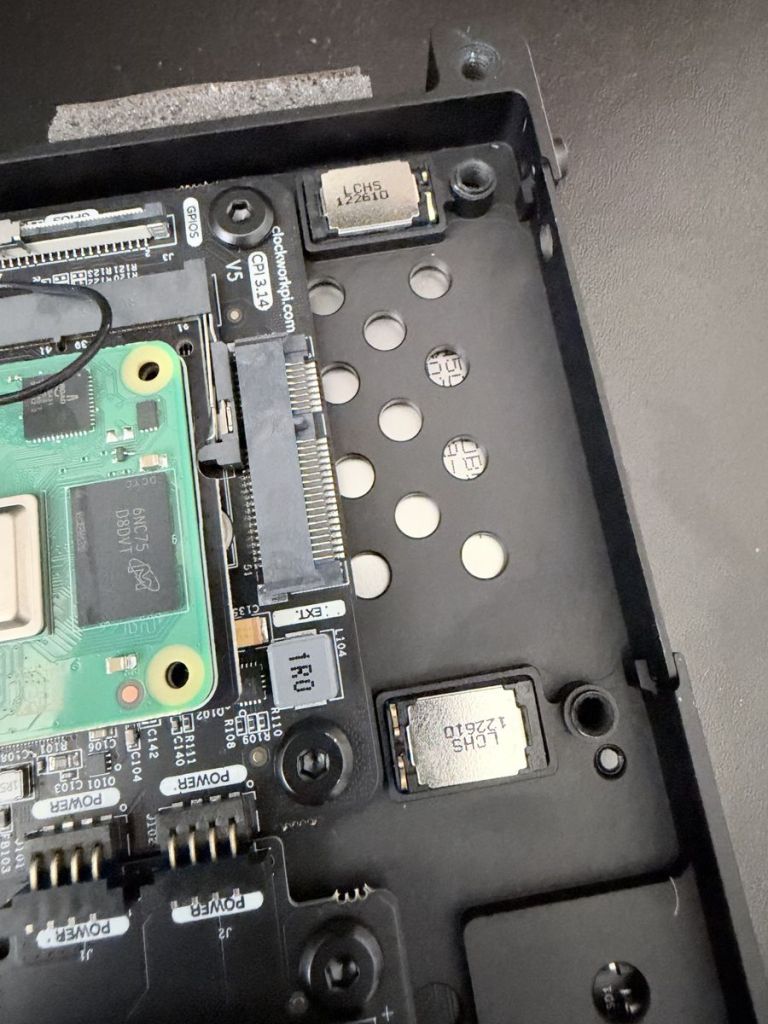
The other confusion was the orientation of the speakers. I watched several videos, and it seemed not to matter: as long as the sticky side goes down, the pads on the extension module should make contact whichever way round the speaker sits. (It didn’t work out that way for me. More on that later.)
The only other thing I had to do was squeeze the heat sink down a bit, because it was too thick. I’d seen others do the same in their videos. I had everything assembled in about half an hour. It turned out I wasn’t close to done.
The trackball
My first issue once it was running was the trackball. It was unusable, with the pointer jumping all over the screen. To work around it, I plugged in a spare USB mouse and keyboard I had lying around, and they worked like a charm.
Reading around, I learned about what uConsole owners call the “trackball lottery”: the little trackball units vary from one to the next, and some are simply bad out of the box. It seemed likely I’d drawn a bad one, so I ordered a few replacement EVQWJN007 trackball switches. In the meantime, I moved on to the next problem.
Sound: from silence to stereo
The next thing I noticed was that there was no audio at all. This was the most frustrating part of the whole experience. I went around and around and got nowhere. It turned out that the biggest part of the problem was that the AI assistant I was using for help was giving me out-of-date information. The uConsole has changed over time, and one of the biggest changes is in how audio is handled, which is different from normal Raspberry Pi practice. None of the audio settings in raspi-config actually work on it anymore. I wasted hours on this before I switched to a different AI assistant, which gave me current information. It was a good reminder that AI help is only as good as how current its information is.
Once I had sound, I tested the speakers properly. Linux has a handy command for this, speaker-test -c2 -t wav, which says “Front Left” and “Front Right” in turn. I heard the right side but not the left.
The useful trick is to plug in headphones (thanks, United Airlines, for handing these out) and run the same test. Both channels came through the headphones perfectly, which tells you the software is fine and the problem sits between the board and the left internal speaker: the speaker itself, its cable, or how it’s seated.
That brought me back to the speaker orientation question from the build. I had installed both speakers the same way round, like the top one in the photo below. Since that one was working, I assumed its orientation was the “right” one. On a hunch, I opened the case and rotated the other speaker 180 degrees. It worked, and I finally had sound from both speakers. So whatever the videos suggest, orientation does matter, at least on my unit: if one speaker is silent, try turning it around.
Wi-Fi: the antenna and the metal case
Next, the Wi-Fi. Most of the time I couldn’t connect to the Internet at all, and when I did, the connection dropped after a few minutes. My first look at iwconfig was misleading: the “31 dBm” it showed was the transmit power, not the received signal, and it turned out I wasn’t even connected to a network. The better command is nmcli dev wifi list, which shows every network in range with a signal score from 0 to 100. My own network came in at about 32, which is weak.
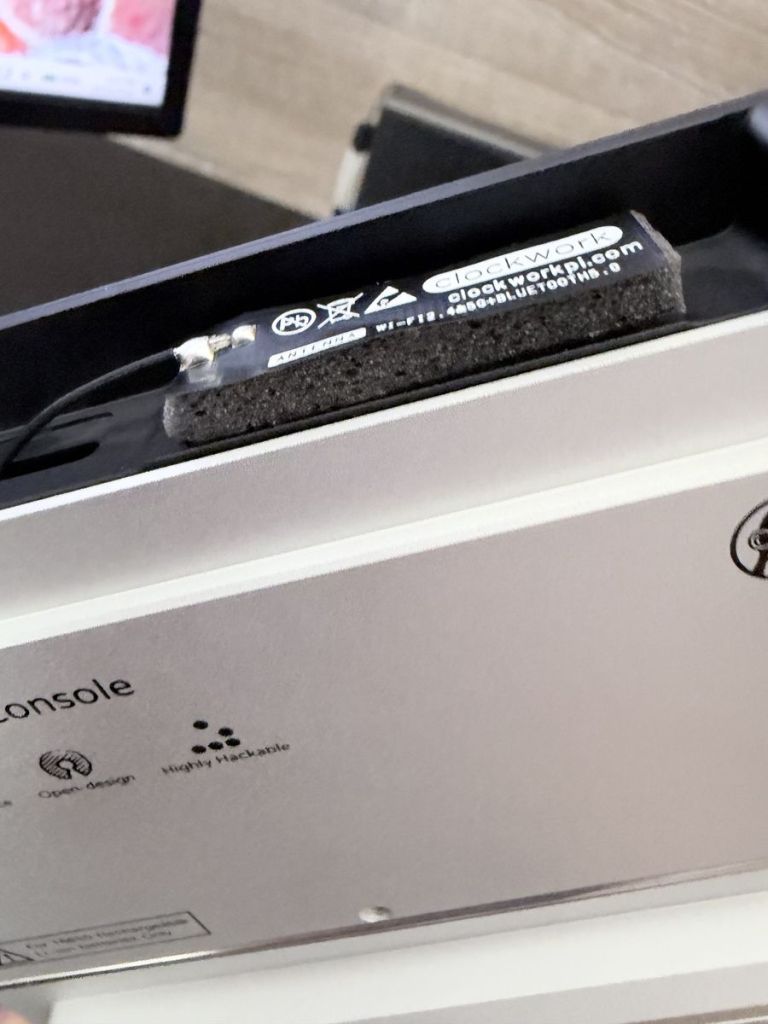
The cause is well known among uConsole owners. The stock Wi-Fi antenna is a thin sticker that the instructions have you mount flat against the inside of the aluminium case, and the metal smothers the signal. When I lifted the antenna off the case, my networks jumped to around 57 to 60. That one change nearly doubled the signal.
To keep that improvement with the case closed, the antenna needs a few millimetres of non-conductive spacer between it and the metal. I used a strip of Frost King 3/16-inch self-stick rubber foam weatherstrip from the hardware store, which costs a few dollars: the foam sticks to the case, and the antenna’s own adhesive back sticks to the foam. [Signal reading with the case closed.]
Two other things are worth checking. With a Raspberry Pi compute module, the antenna cable has to plug into the compute module itself, not the uConsole’s main board. And the module has to be told to use that external antenna by adding dtparam=ant2 to /boot/firmware/config.txt; otherwise it uses the tiny antenna on its own board.
Back to the trackball
After struggling with issue after issue for 12 hours, I reached the breaking point and cried out for help in the Clockworkpi uConsole group on Facebook. A number of people there advised me to flash the trackball firmware. I was finding lots of conflicting information about how to do it, but with the help of an AI assistant I worked out four simple commands that got the job done. After that, the pointer movement was much better, though still not all that great.
sudo apt install -y dfu-util
wget https://github.com/clockworkpi/uConsole/raw/master/Bin/uconsole_keyboard_flash.tar.gz
tar zxvf uconsole_keyboard_flash.tar.gz
cd uconsole_keyboard_flash && sudo ./flash.sh
These install the flashing tool, download ClockworkPi’s official keyboard firmware package, unpack it and run the flash script. Run them in a terminal on the uConsole itself rather than over SSH, with the battery charged and nothing plugged into the USB-A port. The keyboard and trackball stop responding while the flash runs, so have the last command typed in before you press Enter.
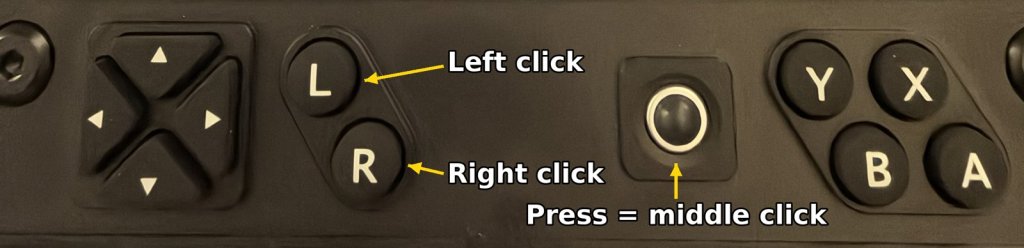
Once the pointer was moving reasonably, I was frustrated that clicking the trackball did nothing. I could tell the device was receiving the click, but nothing happened. That’s when I learned that pressing the trackball is the middle mouse button, not the left one. The left and right mouse buttons are the L and R buttons, between the D-pad and the trackball. Duh!
The replacement trackball switches arrive tomorrow, so we’ll see if they help.
The browser that kept asking for a password
Raspberry Pi OS gives you a choice of browser, Chromium (the open-source version of Chrome) or Firefox, and I chose Chromium. Every time I opened it, it asked me for a password to unlock my keyring. That’s because the uConsole logs in automatically, so the system’s password vault never gets unlocked, and the browser asks for it instead. I don’t know whether Firefox has the same frustration. The fix was to open Passwords and Keys, right-click the Default Keyring, and change its password to blank. The trade-off is that saved browser passwords are then stored unencrypted on the SD card, so I don’t keep anything important saved in the browser on this device.
Where things stand, and what’s next
So now I have everything working. For the moment I’m still relying on the USB keyboard and mouse until the new trackballs arrive, and I suspect I’ll keep using them in most situations anyway. I’ve ordered a 256 GB SanDisk Extreme microSD card, an A2-rated card that should handle the many small reads and writes of a running operating system much better than a basic card. My next task is to give Rex’s community distributions for the uConsole a proper spin. I did try them yesterday along the way, but they didn’t solve my problems, so I went back to the official image. I really want Ubuntu to work, but what I saw yesterday was too sluggish to be usable. Perhaps the faster card will help. More on that once I’ve had a chance to try again.
Finally, a word of thanks. I really appreciate the help and support I got from the members of the Clockworkpi uConsole group on Facebook. When I was at my most frustrated, they pointed me in the right direction.


Leave a Reply